Baby Quilt: Fabric Selection & Assembly Part 1
Have you ever wanted to create a baby quilt but are unsure where to begin? You’re in luck because we here at Dabline have created a comprehensive and easy-to-follow Beginner Baby Quilt series for you.
This blog post series corresponds with our YouTube series for creating a baby quilt from start to finish. If you would like to watch our videos for this series, you can do so here. Part 1 of this blog post series will cover fabric selection, how to cut fabric, and how to sew a simple baby quilt top.
How To Choose Fabric For a Simple Baby Quilt
The quilt style I will be showing you how to make today is a simple strip quilt. This is a great beginner quilt project since you are just sewing strips of fabric together to create a quilt top.
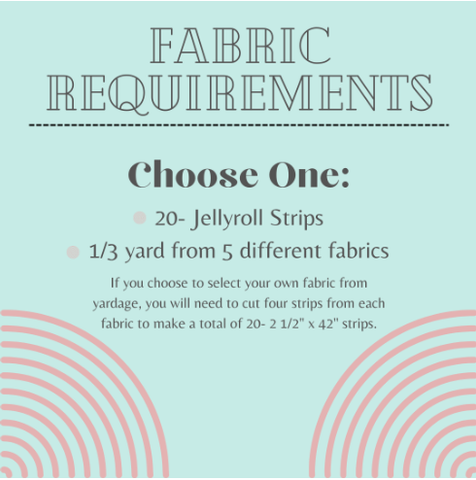
For the example, I used strips that measure 2 ½” x 42”. These are the lengths of strips you will find in the precut bundle called a “jellyroll.” This is a popular precut fabric bundle with 40 precut strips in coordinating fabrics. You will only need one jellyroll for this quilt.

If you would rather choose your own fabrics, that’s great! For this tutorial, I suggest picking five coordinating fabrics. For this quilt, you will need ⅓ yard of each fabric ( 1 ⅔ yard total.)
How To Cut Fabric
If you are using jellyroll strips, you can skip this step, but if you are using yardage, continue with this step.

When using a rotary cutter, you must be extremely careful and mindful of the blade. The blade is sharp, and you don’t want to accidentally knick your skin with it.
Take your fabric and fold it in half-width ways.

Next, place it onto your cutting mat and trim the edge of the fabric to ensure you have a straight and square edge for your first strip. I like to line up one of the inch markings of my ruler with the folded edge of the fabric, like in the image below:

Place your ruler on top of the fabric and hold it securely with your free hand. Line up the straight edge of the fabric with the 2 ½” mark of the ruler

Don’t have your fingers close to the ruler’s edge for safety. Slowly cut the fabric, keeping the blade against the ruler’s edge

Ensure the ruler doesn’t shift on the fabric. This will keep your cut edges straight and even.
We need 20- 2 ½” x WOF (width of fabric) strips for this quilt. Generally, with quilting cotton, the WOF is 42”-44”. Since we are using five fabrics, we need four strips from each fabric.

Cut all your strips from each fabric, take it slow, and keep your ruler in place while cutting. It will take some time to practice using a rotary cutter, but it’s a fantastic tool once you have the hang of it.
How To Sew the Strips Together
First, you want to figure out the layout of the strips. If you are using a jellyroll, you can lay out the strips however you would like since there aren’t duplicates of fabric in your selection. However, if you use yardage, you have five fabrics that should be strategically placed, so two strips of the same fabric aren’t next to each other.
The easiest way to do this is to lay out one strip from each fabric in a row and then repeat the sequence with the remaining strips.

Now comes the fun part: sewing the strips together! This is one of the most fun parts because you get to watch simple strips of fabric become a beautiful quilt top quickly.
Take your first strip and lay it on your workspace right side up. The right side of the fabric is the side that has the pattern on it; the side that will be the outside of the quilt. If you are using solid color fabrics, either side can be the right side.
Next, take the second strip and lay it right side down on the first strip. This is called laying the fabrics right sides together.

Take the two strips to your sewing machine and sew them together using a ¼” seam allowance. That means to sew ¼” away from the edge.

Repeat this step with the rest of the strips, placing the next strip on the previous strip right sides together and sewing with a ¼” seam allowance.

Your quilt top will begin to take shape quickly!

And there you have it! A beautiful baby quilt top that you made in just a short time. You should be really proud of yourself.
That’s it for this blog post; stay tuned for our next part of the series, where we’ll go over how to press your seams so they lay flat, and then I’ll show you how to baste a quilt for quilting.
Dabline Quilting Essentials
Quality quilting essentials, achieve flawless free-motion patterns with ease.


Leave a comment